Coefficient of Thermal Expansion
The Necessity of a 3mm Gap
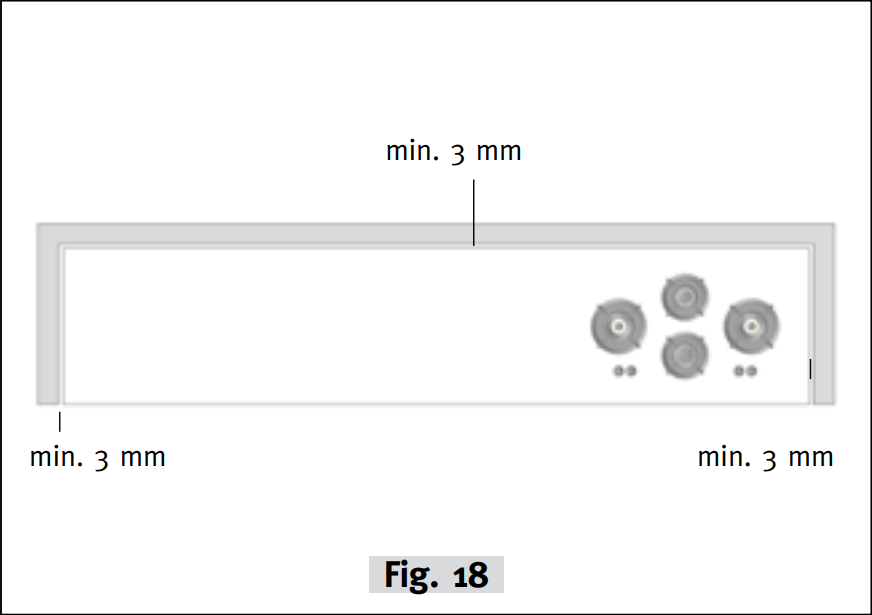

The 3mm Expansion Gap: A Preventive Measure
“In the realm of precise kitchen installations, the 3mm gap is not merely a suggestion—it’s a preemptive strategy to counteract the subtle yet significant forces of thermal expansion. Much like the intentional slack given to a bridge structure to accommodate the ebb and flow of temperature changes, this gap serves as a tolerance buffer. It ensures the integrity of benchtop materials—be they marble, quartz, granite, or porcelain—allowing them to expand and contract without constraint, preserving both form and function.”
Why a Level Surface is Non-negotiable
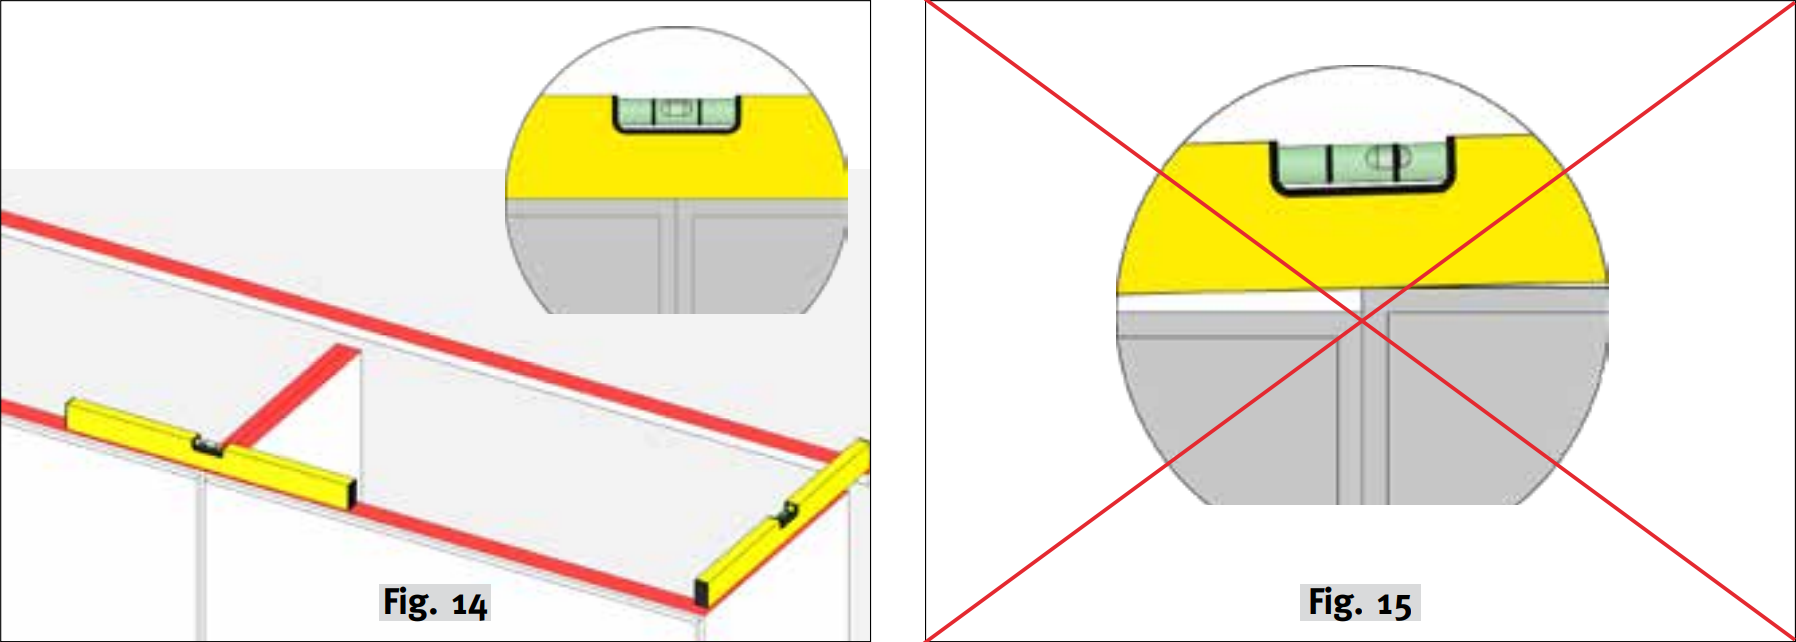
 “Imagine setting a precision instrument on an uneven surface; its accuracy falters, and its purpose is compromised. The same principle applies to the installation of kitchen benchtops. A level surface is fundamental—not just for the aesthetic alignment but to distribute the thermal and mechanical loads evenly. It is about achieving equilibrium where the material can undergo thermal changes in a state of balance, ensuring longevity and maintaining the immaculate appearance of the kitchen’s centerpiece.”
Ensuring Proper Support for Benchtops
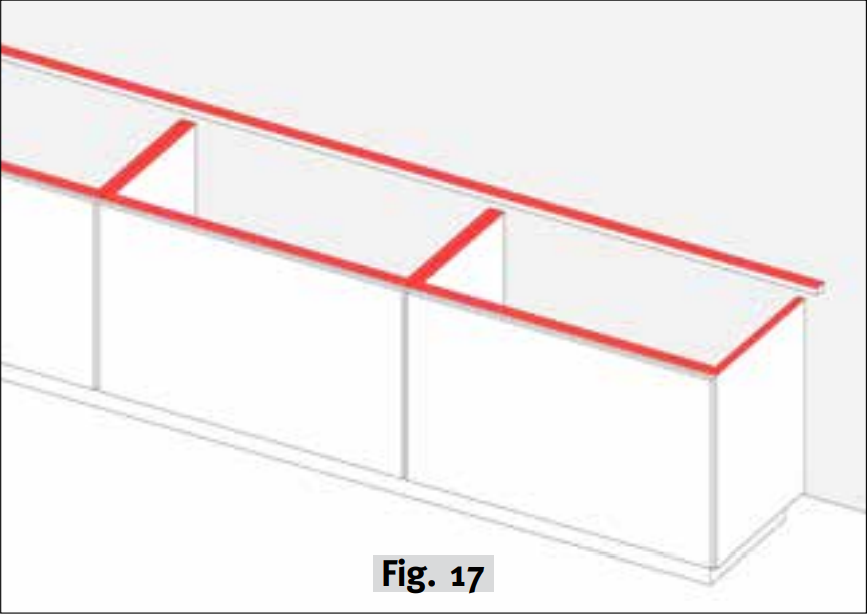

The Foundation of Support: Balancing Compression and Tension
“Imagine placing a slab of benchtop material, akin to a stone slab, on perfectly level ground. If you and I were to stand atop this slab for a week, remarkably, nothing adverse would occur. This scenario exemplifies stone’s affinity for compression—it thrives under direct pressure.
However, let’s elevate this scenario—literally. If we were to raise the slab 900mm above the ground, supporting it only at its ends with two sawhorses, the outcome would starkly contrast. Under these conditions, the stone’s integrity is compromised; it could very well snap under its own weight. This dramatic shift from stability to vulnerability underscores the critical need for proper cabinetry support. Stone inherently lacks flexibility and is vulnerable under tension. This means that while it can handle vertical pressure well (compression), it does not tolerate being twisted or bent.
Our cooktops, known for their high quality materials add weight and sometimes length of upto 1200mm, require a foundation that can support not just their mass but also distribute this weight evenly. This requirement highlights why a uniformly supported benchtop is non-negotiable. It must be thoroughly braced from the front, back, left, and right—to prevent any risk of stress damage.
The support bars we provide are engineered to support the benchtop’s structure. Their role is critical: they are designed specifically to reinforce the benchtop, preventing any sagging or bending that could compromise the stone under the weight of our high-quality cooktops. This support system ensures that the benchtop remains stable and secure, maintaining its pristine condition and structural integrity over time.
In essence, maintaining a level and well-supported benchtop is not just important—it’s imperative.”
Understanding the Coefficient of Thermal Expansion (CTE)
When installing kitchen benchtops for any cooking systems, it’s important to consider the coefficient of thermal expansion (CTE), which quantifies how the size of a material changes with temperature variations.
The mathematical representation of CTE is:
$$ \alpha = \frac{\Delta L}{L_0 \Delta T} $$
Where:
$$
\begin{array}{|c|c|}
\hline
\text{Term} & \text{Description} \\
\hline
\alpha & \text{Coefficient of thermal expansion} \\
\Delta L & \text{Change in length} \\
L_0 & \text{Initial length} \\
\Delta T & \text{Change in temperature} \\
\hline
\end{array}
$$
Thermal Expansion in Common Benchtop Materials
Here is how various materials expand with a temperature increase of 10°C, displayed for different lengths:
$$
\begin{array}{|c|c|c|c|c|}
\hline
\text{Length (m)} & \text{Marble (mm)} & \text{Granite (mm)} & \text{Quartz Stone (mm)} & \text{Porcelain (mm)} \\
\hline
1.7 & 1.615 & 1.4365 & 2.805 & 1.2325 \\
1.8 & 1.710 & 1.5210 & 2.970 & 1.3050 \\
1.9 & 1.805 & 1.6055 & 3.135 & 1.3775 \\
2.0 & 1.900 & 1.6900 & 3.300 & 1.4500 \\
2.1 & 1.995 & 1.7745 & 3.465 & 1.5225 \\
2.2 & 2.090 & 1.8590 & 3.630 & 1.5950 \\
\hline
\end{array}
$$
Conclusion
Properly accounting for CTE and ensuring adequate space for thermal expansion are key for the durability and functionality of kitchen benchtops with PITT® cooking systems. For detailed installation instructions, please refer to the PITT® Cooking Benchtop and Cabinetry procedures
and guidelines guide.
